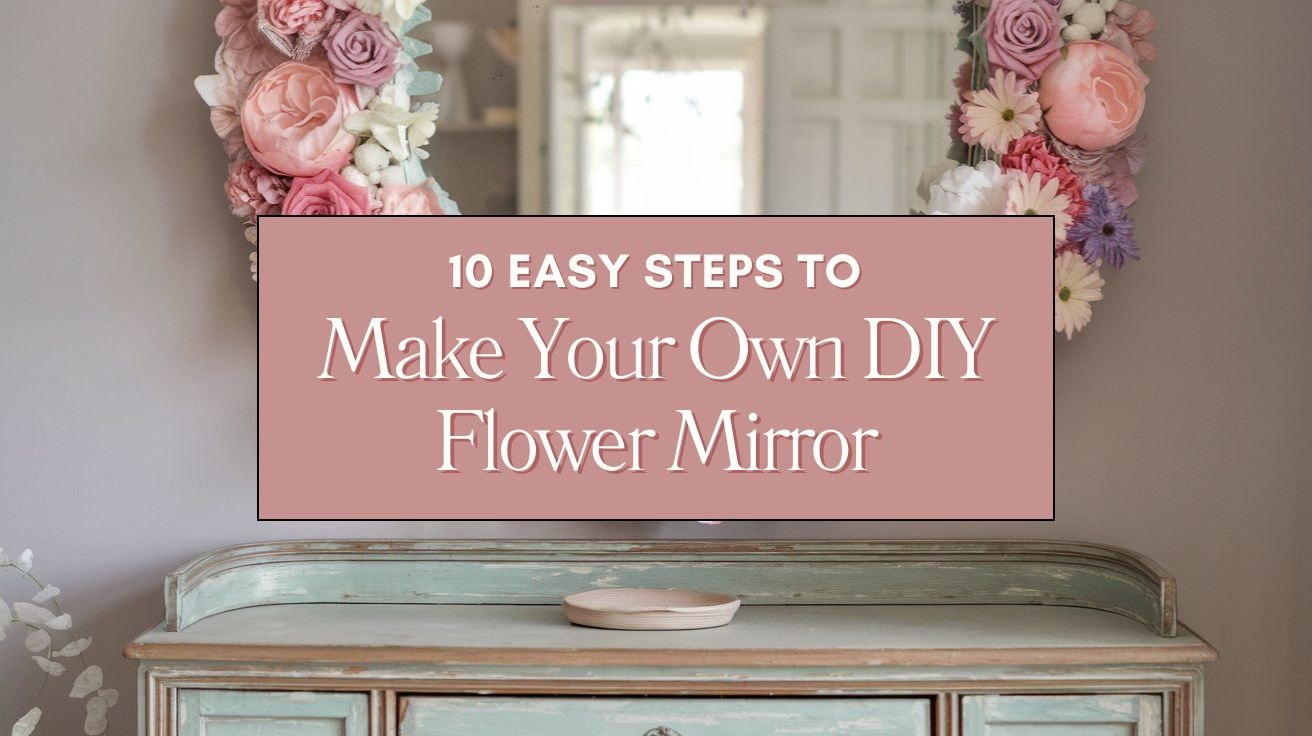
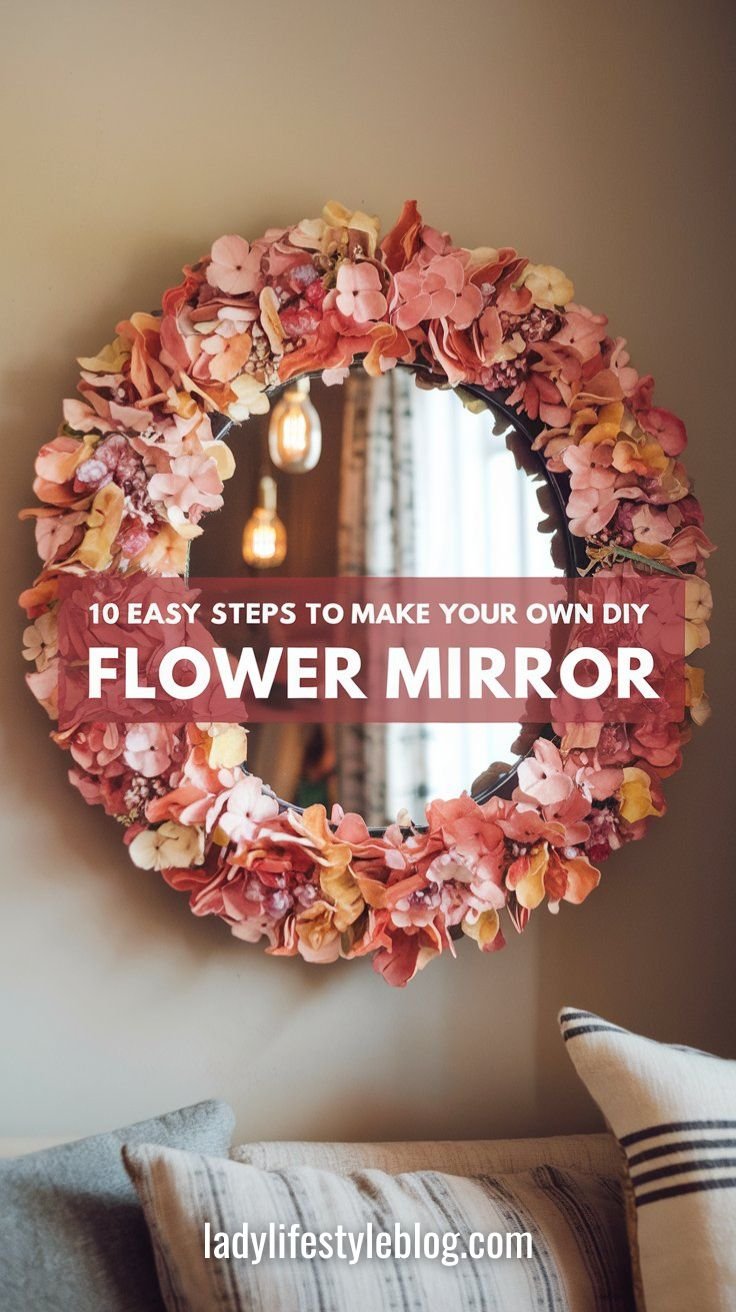
Imagine walking into your room and being greeted by a gorgeous, floral-framed mirror that looks straight out of a boutique. The best part? You made it yourself! A DIY flower mirror is the perfect way to add a whimsical, feminine touch to your space. Whether you’re decorating a vanity, sprucing up your dorm, or adding charm to your entryway, this project is fun, affordable, and totally customizable. Let’s dive into the step-by-step guide to creating your own DIY flower mirror!
What You Might Need
Before we begin, gather these supplies:
- A round or rectangular mirror
- Faux flowers (variety of sizes and colors)
- Hot glue gun & glue sticks
- Scissors or wire cutters
- Floral wire (optional for extra security)
- Cardboard or foam board (if making a backing)
- Acrylic paint (optional for background color)
- Greenery (leaves, vines, or filler flowers for a natural look)
Now that you have everything, let’s get crafting!

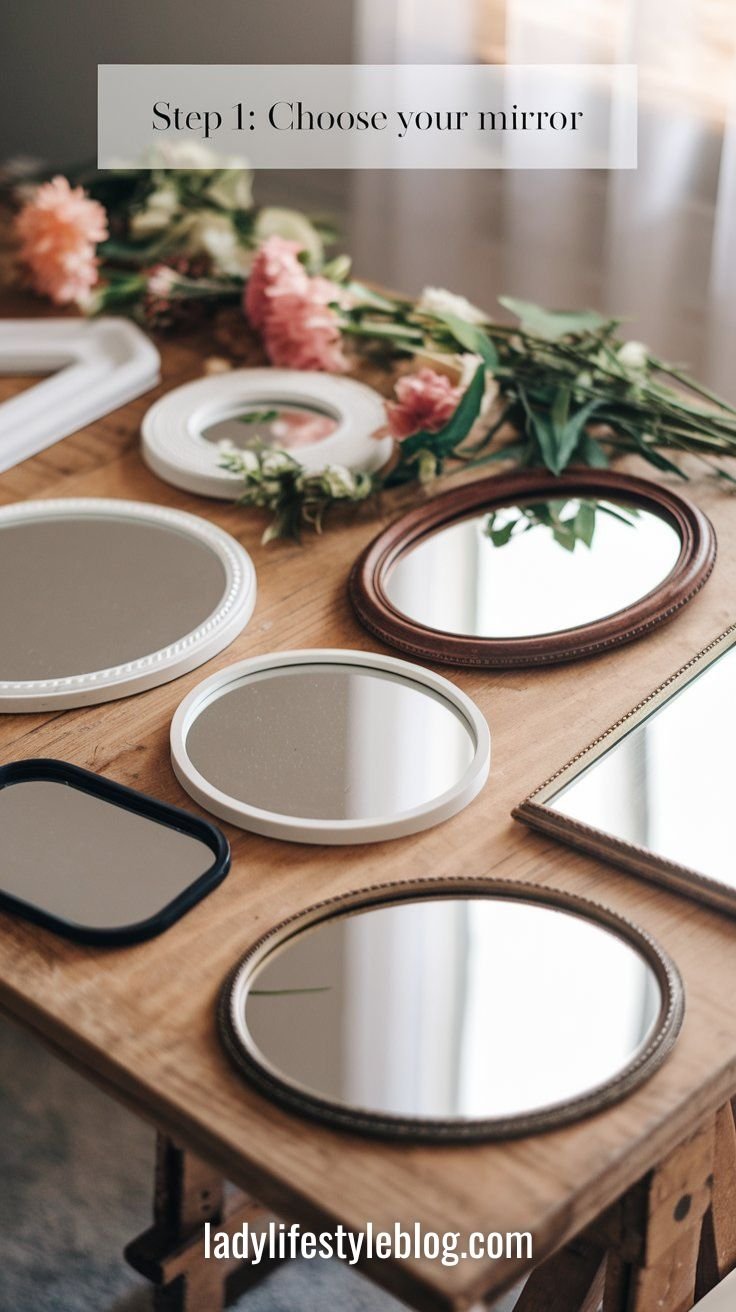
Step 1: Choose Your Mirror
Start by picking the perfect mirror for your DIY flower mirror. Round mirrors create a soft, elegant look, while rectangular or oval shapes work great for a modern aesthetic. You can use an old mirror you already have or grab an affordable one from a thrift store.
Pro Tip: Opt for a lightweight mirror if you plan to hang it with adhesive hooks—safer and renter-friendly!
Budget-Friendly Hack: Check dollar stores or thrift shops for old mirrors. You can upcycle one for under $5!
Picture This:
A plain, round mirror sits on your craft table, just waiting to be transformed into a dreamy, floral masterpiece.
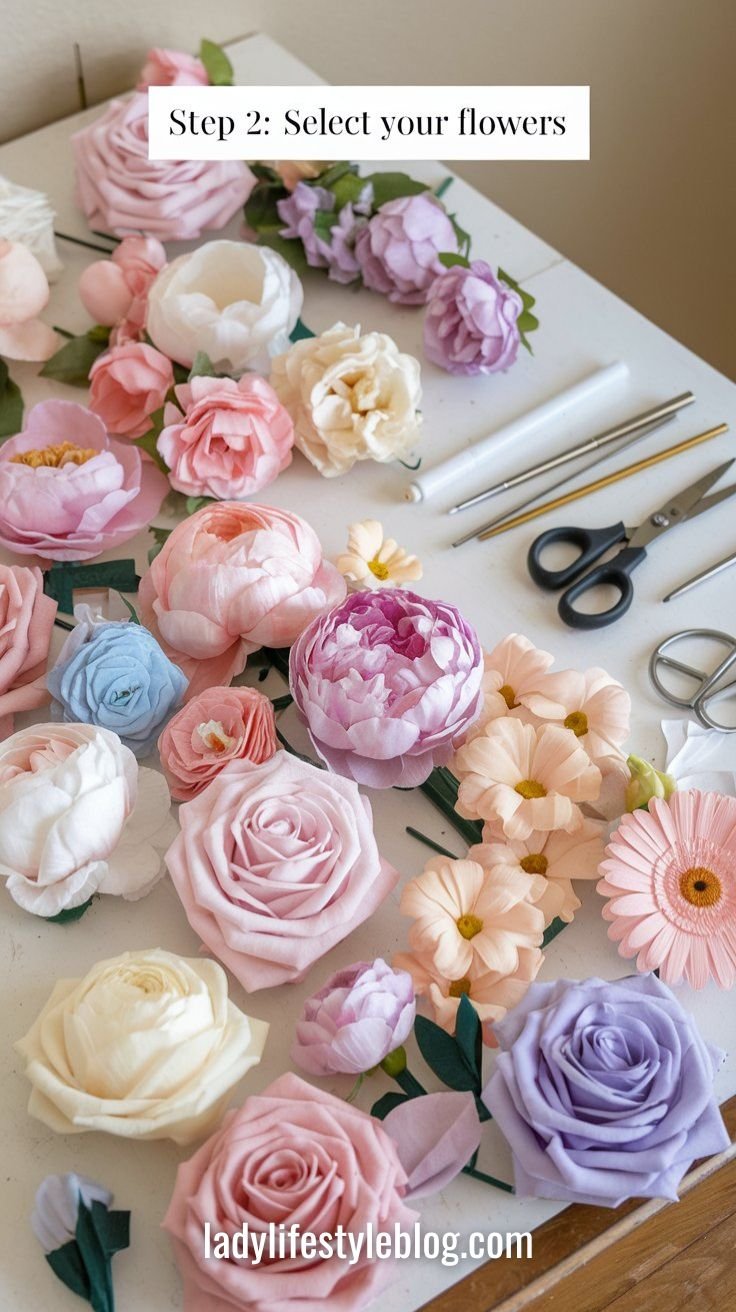
Step 2: Select Your Flowers
Choose faux flowers that match your style and color scheme. Mixing large blooms with smaller flowers and greenery creates a balanced, natural look. Go for pastels for a soft, romantic vibe, or bold colors for a statement piece.
Pro Tip: Stick to an odd number of flower types (like 3 or 5) for a natural, visually balanced look.
Budget-Friendly Hack: Use faux floral garlands—they often come with mixed flower types and are cheaper than buying individual stems.
Picture This:
A pile of beautiful silk roses, peonies, and daisies spread out, waiting to be arranged into a stunning floral frame.
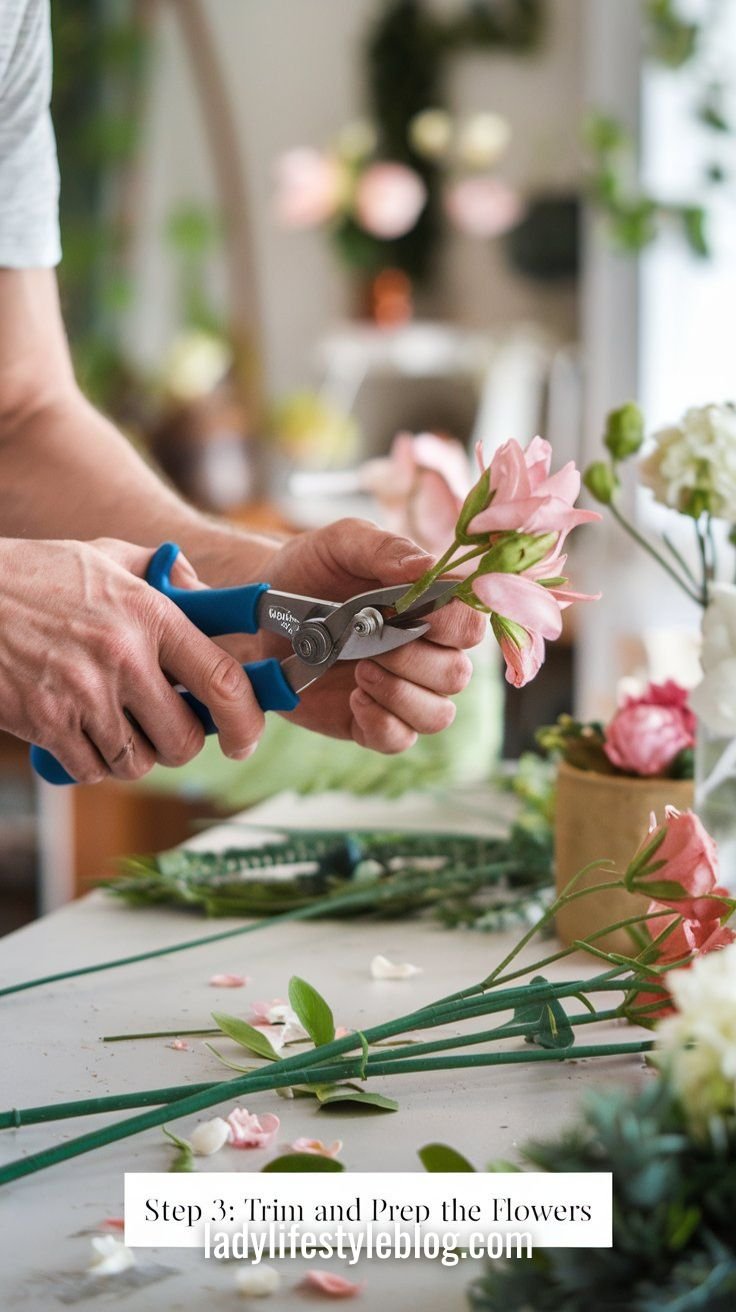
Step 3: Trim and Prep the Flowers
Using scissors or wire cutters, trim the stems of your faux flowers, leaving just enough to secure them to the mirror. Remove any excess leaves that might make gluing tricky.
Pro Tip: Slightly bend the trimmed stems inward toward the mirror edge for a 3D “hugging” effect.
Budget-Friendly Hack: Save any pretty leaves or petals you trim off—they make great filler in empty spots!
Picture This:
Tiny piles of petals and trimmed stems surround you as you prepare each flower for its perfect spot on the mirror.
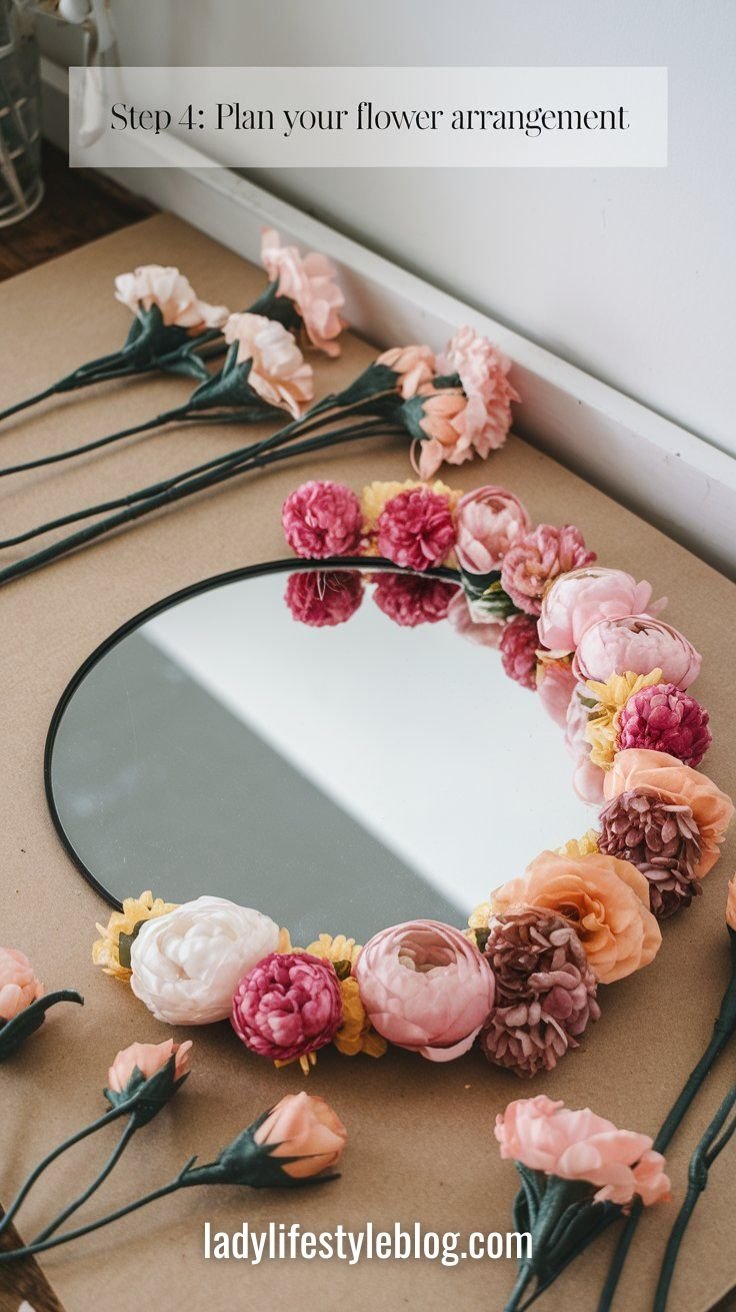
Step 4: Plan Your Flower Arrangement
Before gluing, arrange your flowers around the mirror to find the perfect layout. Start with larger blooms as focal points, then fill in gaps with smaller flowers and greenery.
Pro Tip: Take a quick photo of your planned layout before gluing. This makes it easy to recreate if pieces shift.
Budget-Friendly Hack: Lay your design on a piece of kraft paper or newspaper first—no surprises and no wasted glue!
Picture This:
A stunning floral arrangement encircles your mirror, perfectly placed before it’s permanently secured.
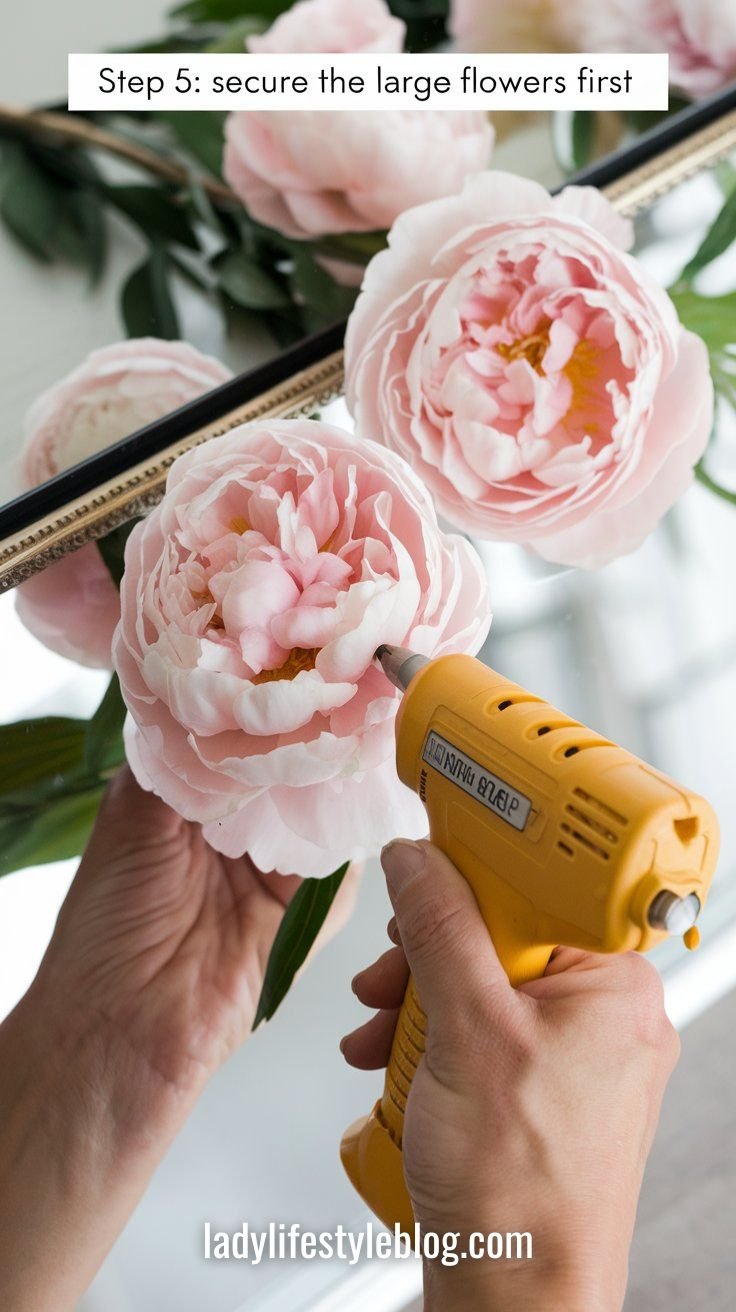
Step 5: Secure the Large Flowers First
Using a hot glue gun, attach the largest flowers first. Press each one firmly against the mirror’s edge and hold for a few seconds to set.
Pro Tip: Use a low-temp glue gun on delicate petals to avoid melting or discoloration.
Budget-Friendly Hack: Place your large blooms at the corners or along one side only for a trendy asymmetrical look that saves supplies.
Picture This:
The first flowers are now secured, forming the foundation of your DIY flower mirror, looking lush and full.
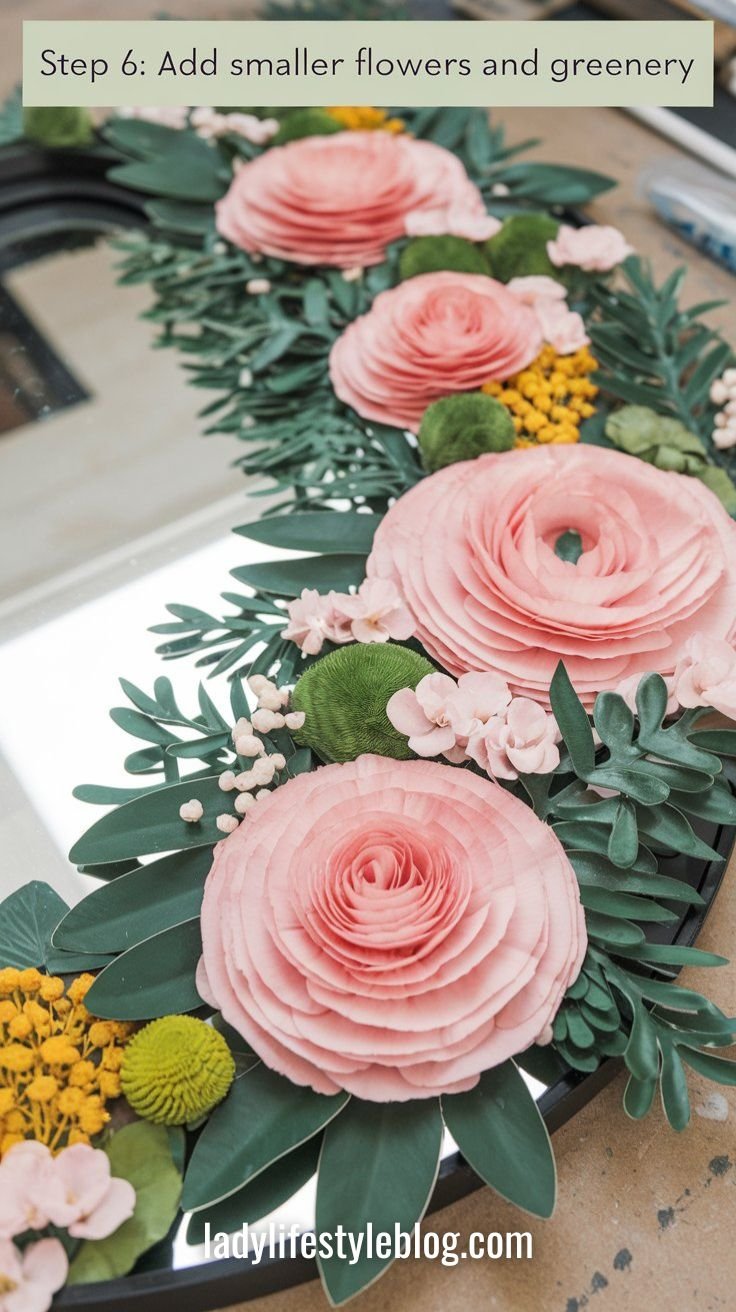
Step 6: Add Smaller Flowers and Greenery
Now, fill in gaps with smaller flowers, vines, or leaves. This step enhances the depth and makes your mirror look professionally arranged.
Pro Tip: Alternate direction as you add greenery for a natural “growing” feel—like it’s wrapping around the mirror.
Budget-Friendly Hack: Fill sparse areas with leftover gift wrap tissue or cut paper flowers from an old magazine—hello, texture on a dime!
Picture This:
Delicate greenery intertwines with colorful blossoms, giving your mirror a natural, fresh-picked bouquet look.
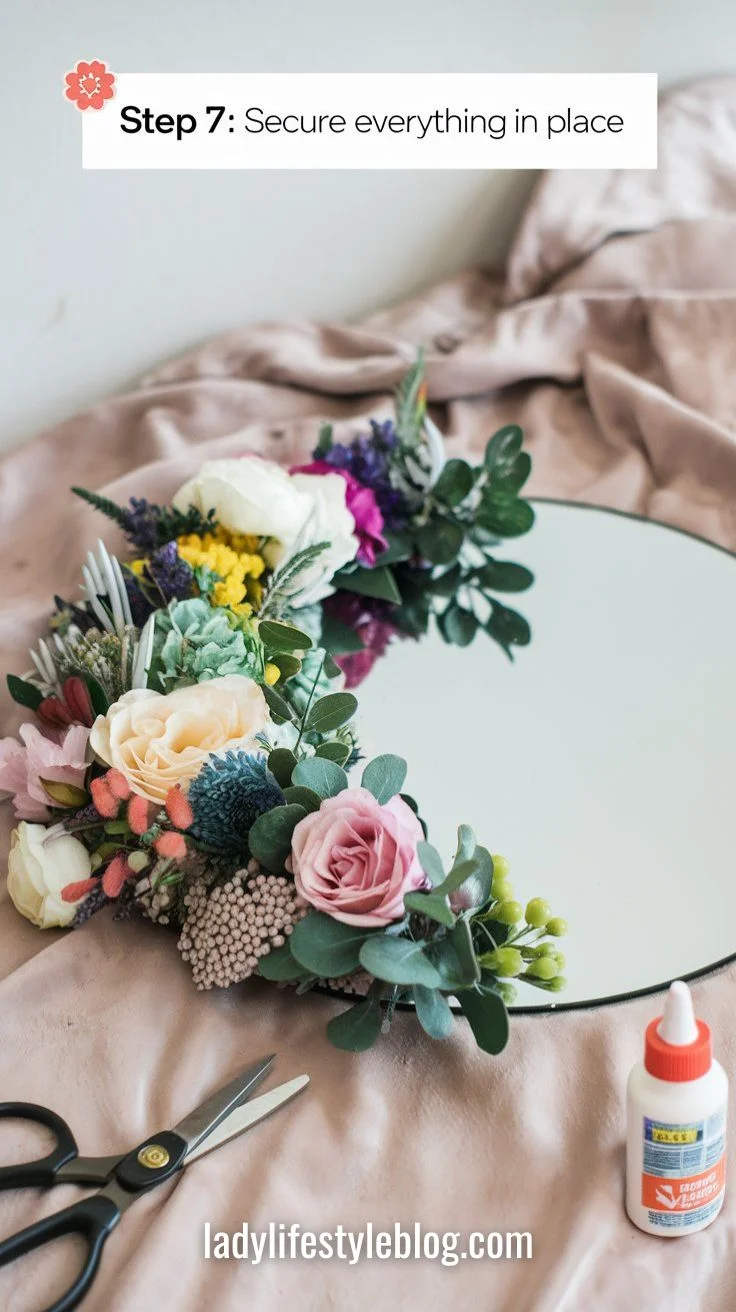
Step 7: Secure Everything in Place
Once all flowers are positioned, check for any loose areas. Use additional glue to reinforce any weak spots or add floral wire for extra stability.
Pro Tip: Reinforce heavy or layered spots with floral wire loops hidden under the petals for long-lasting durability.
Budget-Friendly Hack: Use twist ties (from bread bags!) instead of floral wire—they work just as well and cost nothing.
Picture This:
A fully covered floral mirror frame, securely fastened and looking absolutely dreamy!
Step 8: Customize with Paint or Accents (Optional)
For extra flair, consider painting the mirror’s base before adding flowers or incorporating pearls, fairy lights, or glitter for a unique touch.
Pro Tip: Add paint before flower placement for cleaner edges. Or dab metallic paint on flower tips for a dipped effect.
Budget-Friendly Hack: Reuse old jewelry (like broken pearl bracelets or earrings) for glam sparkle embellishments.
Picture This:
A hint of sparkle catches the light, making your DIY flower mirror look like a custom piece from a high-end boutique.

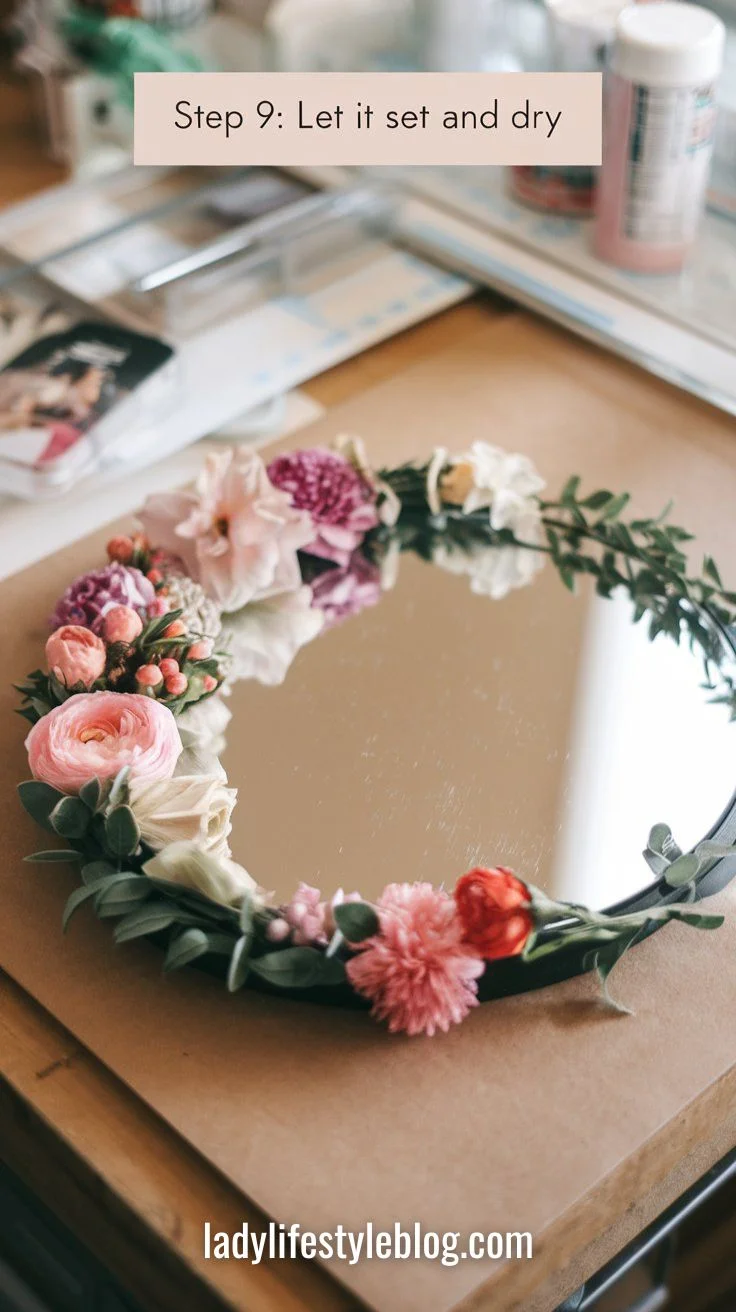
Step 9: Let It Set and Dry
Allow the glue to fully dry before moving your mirror. This ensures your flowers stay in place and don’t shift over time.
Pro Tip: If you’re in a hurry, use a cool setting on your hairdryer to speed up the glue drying process without damaging flowers.
Budget-Friendly Hack: Set your mirror near a sunny window—natural warmth helps glue set faster (plus, it looks pretty while drying!).
Picture This:
Your mirror rests on the table, flowers perfectly set, awaiting its final reveal.
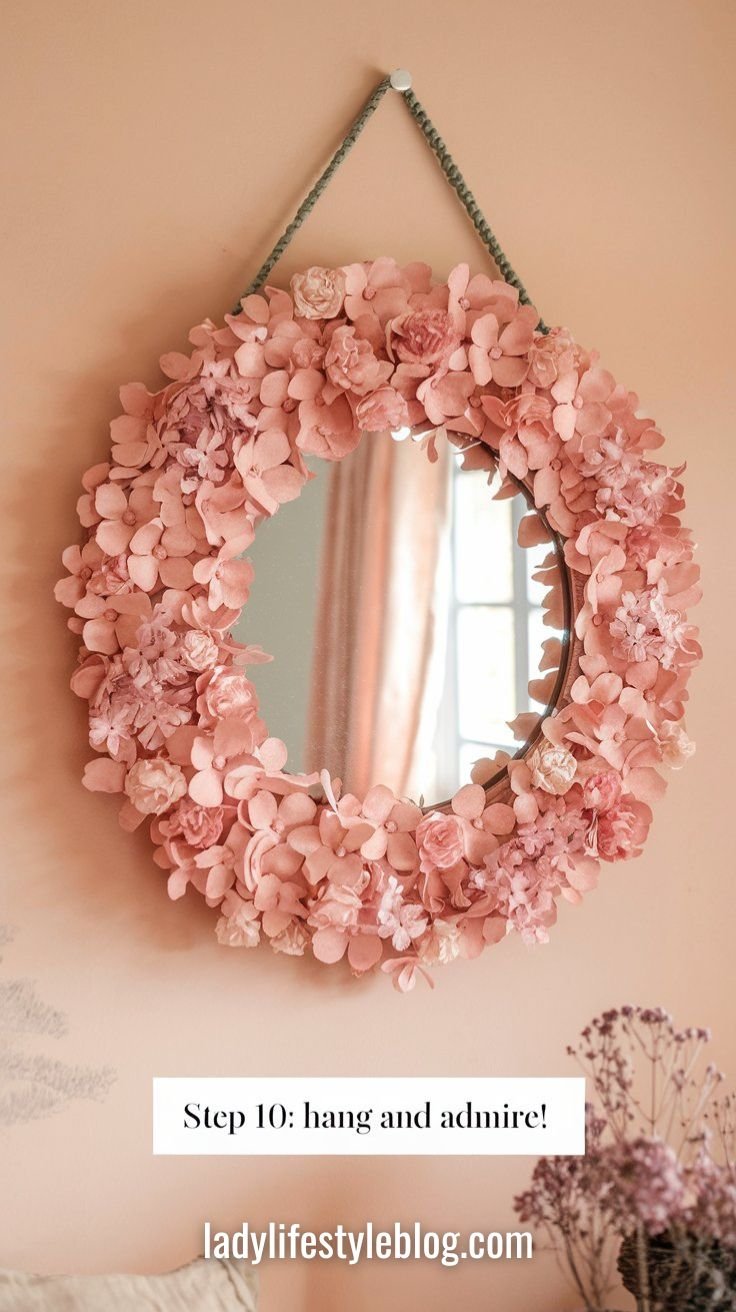
Step 10: Hang and Admire!
Choose the perfect spot for your mirror—whether above a vanity, in a hallway, or as part of a gallery wall. Secure it with strong hooks or display it on a shelf.
Pro Tip: Use removable Command strips if you’re renting—no damage, and it holds surprisingly well for lightweight mirrors.
Budget-Friendly Hack: Display it on an easel or prop it against the wall on a shelf—zero need for nails or hooks.
Picture This:
Your floral mirror hangs beautifully, reflecting light and adding the perfect floral touch to your space.
Flower Combinations That Always Work
These combos are go-to favorites for a dreamy, balanced flower mirror:
Romantic & Soft
- Blush roses + white peonies + baby’s breath + eucalyptus
- Perfect for bedrooms and vanity corners.
Sunny & Bright
- Sunflowers + yellow daisies + orange zinnias + mini ferns
- Great for boho kitchens or cheerful entryways.
Cool & Calming
- Lavender + hydrangeas + thistles + dusty miller
- Ideal for bathrooms or peaceful reading nooks.
Whimsical Pastel
- Pink tulips + lilac cosmos + pale ranunculus + trailing vines
- Adds instant fairytale vibes to any space.
Crafting Survival Guide for Parents
If you’ve got little hands eager to help, turning this DIY flower mirror project into a family-friendly craft session is totally doable—with a few clever tweaks. Start by setting up a “yes space” with newspaper or a plastic tablecloth and keep all sharp tools out of reach. Let your child choose flower colors or sort petals by size—this gives them creative control without the mess spiraling.
If using a hot glue gun, designate yourself as the official “glue boss” while your kid hands you the flowers in the order they want them placed. For younger crafters, consider using glue dots or double-sided tape instead. And if you’re not ready to commit faux blooms to a mirror just yet, have your child practice their arrangement on cardboard first.
Pro Tip: Turn leftover faux flowers into matching mini art—think bookmarks, photo frames, or a mini mirror just for them.
Budget-Friendly Hack: Use paper or felt flowers from the dollar store for a safer, kid-approved version that still looks totally charming.
FAQ
1. Can I use real flowers instead of faux flowers?
Real flowers won’t last, but you can use dried flowers for a rustic, vintage look. Faux flowers are more durable and long-lasting.
2. How do I clean my DIY flower mirror?
Use a soft cloth to wipe the mirror and a duster to keep the flowers fresh. Avoid spraying cleaners directly onto the flowers.
3. Where can I buy affordable faux flowers?
Check craft stores, dollar stores, or online marketplaces for budget-friendly options.
4. How can I make my mirror look fuller?
Layer different sizes of flowers and incorporate greenery for a lush, full effect.
5. Can I remove the flowers later?
Yes! If you use hot glue, the flowers can be carefully peeled off for future redesigns.
Conclusion
Creating a DIY flower mirror is an easy and fun way to personalize your space with floral elegance. With just a few supplies and a little creativity, you can craft a stunning decor piece that looks like it came from a designer store. So grab your glue gun, pick your favorite blooms, and start making your own beautiful DIY flower mirror today!
Are you ready to try this project? Tag your creations on social media—I’d love to see your stunning mirrors!
At Lady Lifestyle Blog, I use AI as a tool to assist with research, idea generation, and content refinement. While much of my content is shaped with AI’s help, I personally review and adjust each post to ensure it aligns with the blog’s style and purpose. My focus is on providing stylish, creative, and practical inspiration for every modern lady!