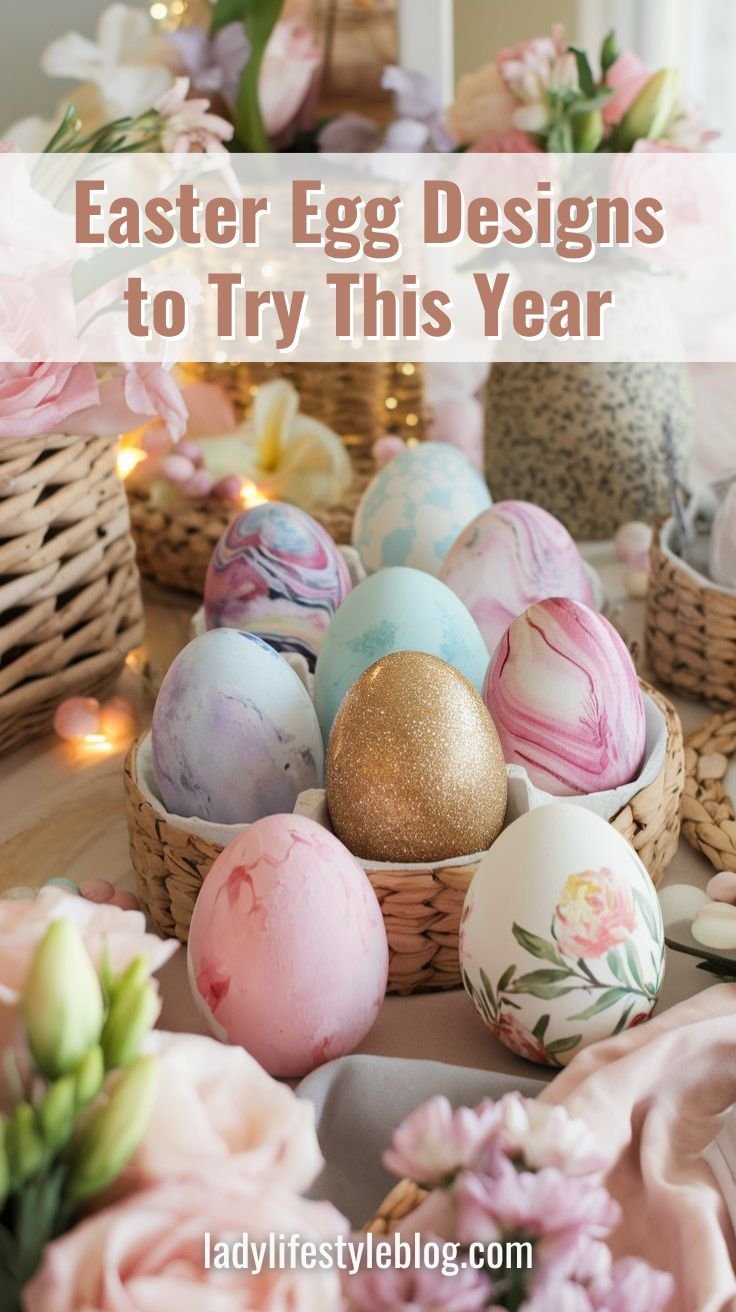
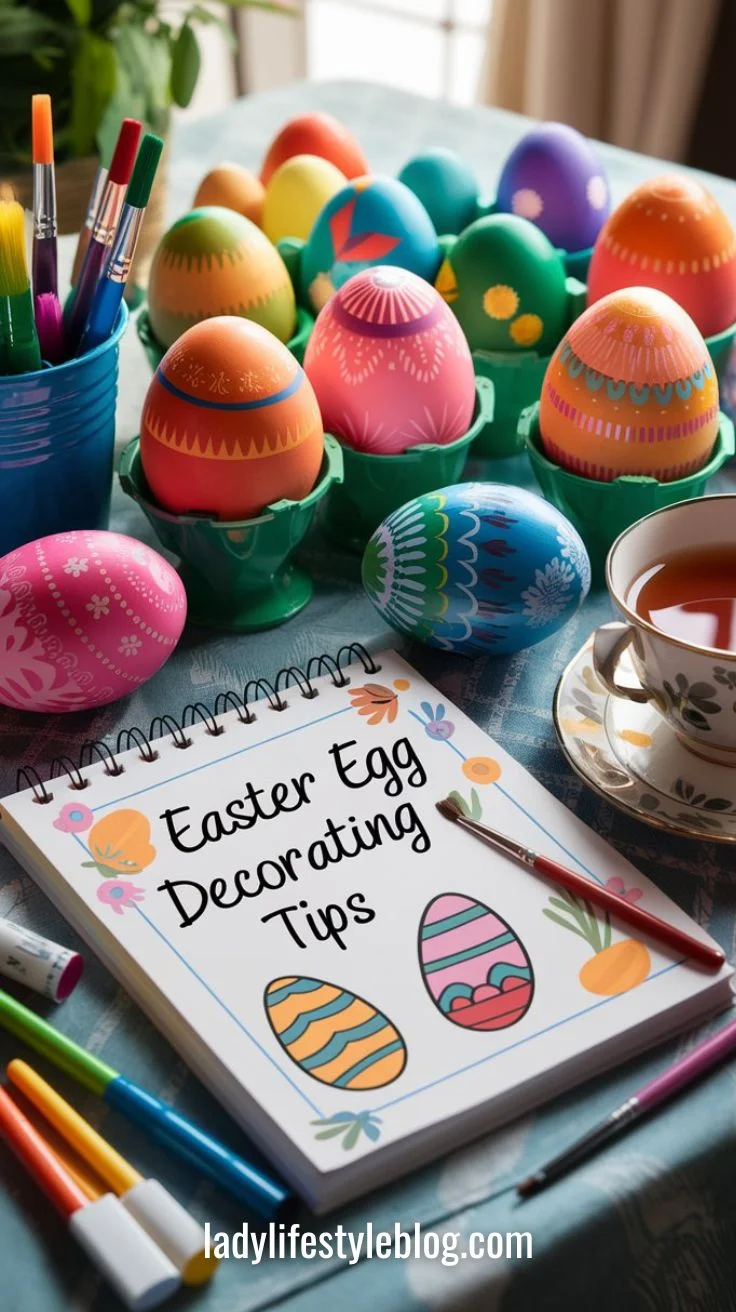
Every year, I tell myself I’ll keep my Easter eggs simple… and every year, I end up covered in paint, glitter, and food dye. But honestly? That’s half the fun! Whether you love classic pastels or bold modern patterns, Easter egg decorating is all about creativity. This year, why not try something fresh? Here are 7 stunning Easter egg designs that will wow your guests and make your Easter basket Instagram-worthy!
What You Might Need
Before we dive in, here’s a quick list of supplies you may need for these Easter egg designs:
- Hard-boiled or hollowed eggs
- Food coloring or egg dye
- Paint and brushes
- Markers or sharpies
- Stickers, washi tape, or vinyl stencils
- Glitter, sequins, or rhinestones
- Mod Podge or glue
- Natural dye ingredients (like turmeric, red cabbage, or onion skins)
- Cotton swabs, sponges, or toothbrushes for texture effects
- Rubber bands or string for tie-dye effects

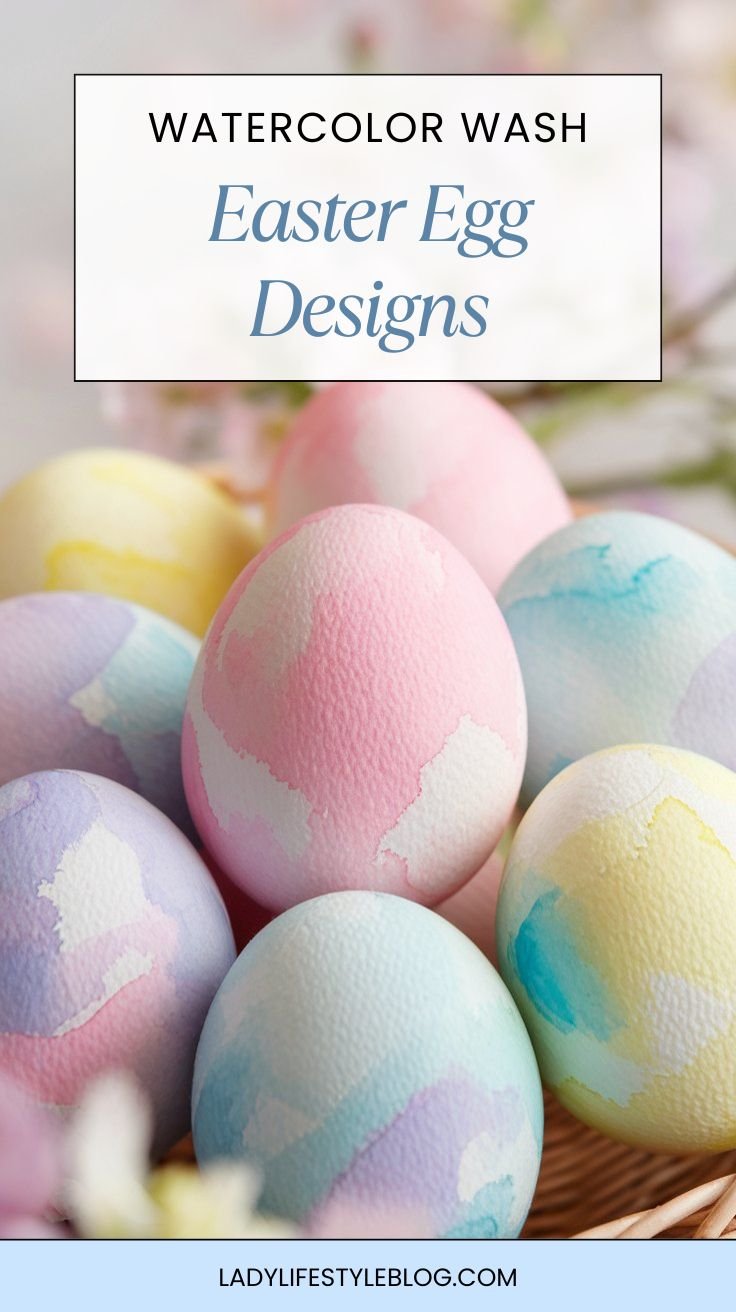
Watercolor Wash Easter Egg Designs
Give your Easter eggs a dreamy, watercolor effect with soft, blended hues.
How to Do It:
- Start with white eggs for the best color payoff.
- Dilute acrylic paint or food coloring with water.
- Use a soft brush or sponge to dab on the colors in a swirling motion.
- Blend different colors while they’re still wet for a seamless transition.
- Let dry and finish with a light spray of clear sealant for shine.
Pro Tips:
- Use a white crayon to draw patterns before painting. The wax resists the paint, creating a beautiful hidden design.
- Layer colors for a soft ombré effect. Start light and gradually add deeper shades.
- Let eggs dry on a cooling rack to avoid smudging or flat spots.
Common Mistakes:
- Using too much water can make colors run together into a muddy mess. Use a damp, not soaked, brush.
- Rushing the drying process—handling wet eggs too soon can leave fingerprints and smudges.
- Not sealing the eggs with a clear spray or Mod Podge. This keeps colors vibrant and prevents fading.
Picture This: A basket of pastel eggs with soft, blended colors that look like they belong in an art gallery—pure Easter magic!
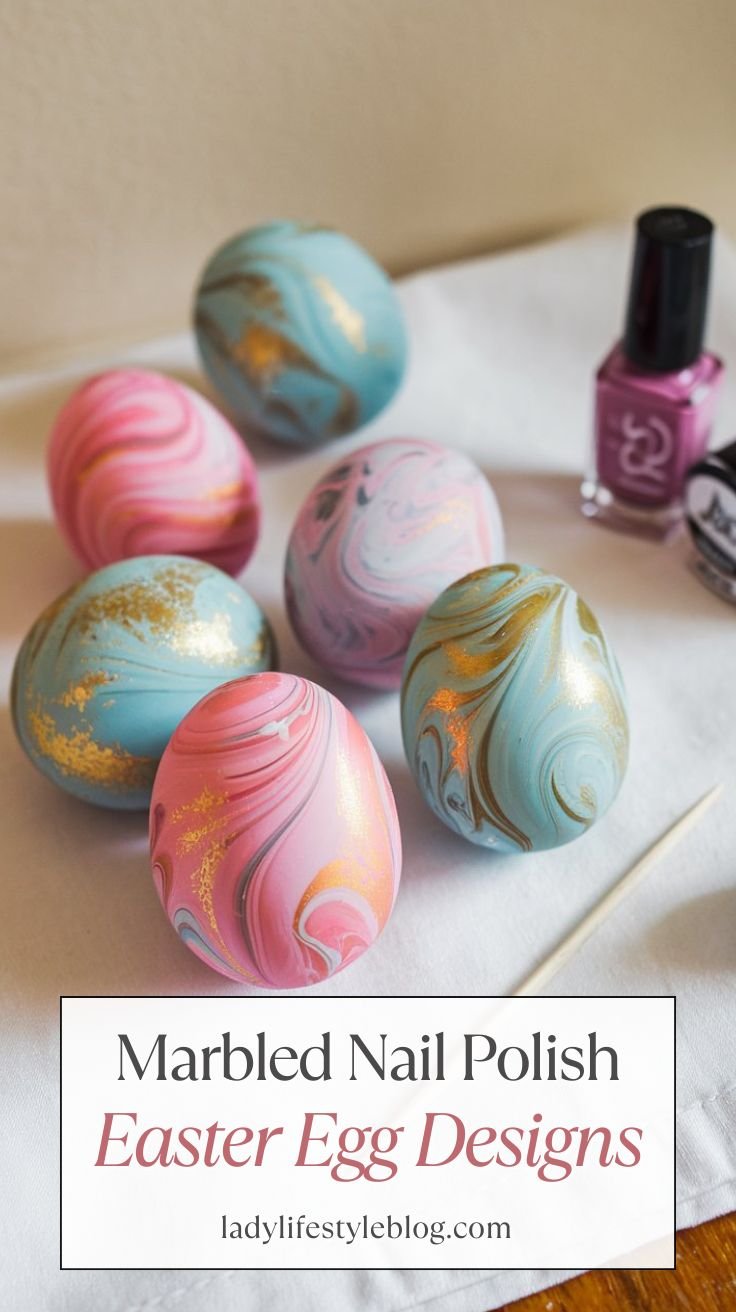
Marbled Nail Polish Easter Egg Designs
This marbling technique creates stunning, one-of-a-kind eggs with vibrant swirls.
How to Do It:
- Fill a disposable bowl with room-temperature water.
- Drip a few drops of nail polish onto the surface and swirl with a toothpick.
- Dip the egg in slowly, rolling to pick up the pattern.
- Let dry on a wire rack and repeat with different colors for a layered effect.
Pro Tips:
- Use a toothpick to create delicate swirls before dipping the egg for a more controlled marbling effect.
- Work fast—nail polish dries quickly on the water’s surface.
- Use white or pastel-colored eggs to make the marbled colors pop.
Common Mistakes:
- Using cold water—the polish won’t spread properly. Always use room-temperature water.
- Dripping too much polish into the water can create clumps instead of smooth swirls.
- Not wearing gloves—this technique can get messy fast.
Picture This: Swirled eggs in dazzling shades of pink, blue, and gold—each one looking like a little work of art!
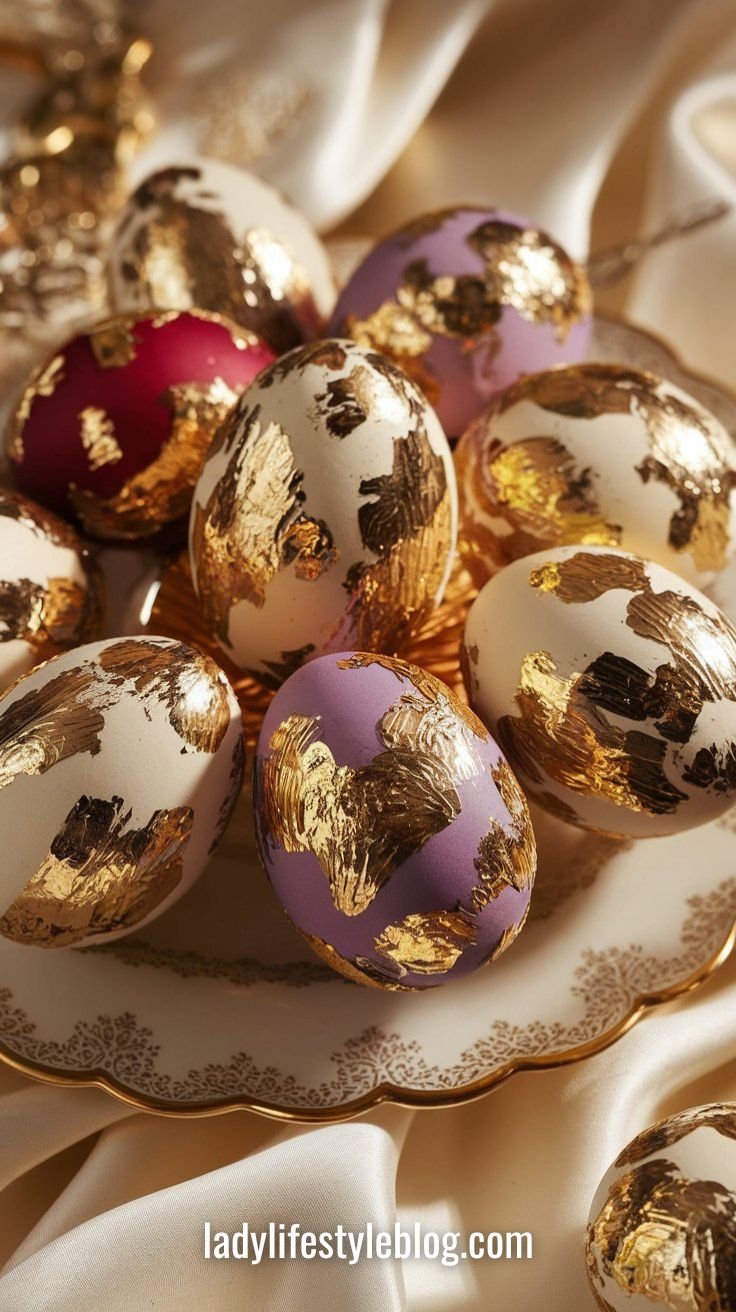
Gold Leaf Glam Easter Egg Designs
Add a touch of luxury to your Easter eggs with shimmering gold leaf accents.
How to Do It:
- Paint your eggs in a solid pastel or jewel tone and let dry.
- Apply a thin layer of Mod Podge where you want the gold leaf to stick.
- Press gold leaf onto the glue, then gently brush away excess with a soft brush.
- Seal with a clear coat for durability.
Pro Tips:
- Brush on glue in different patterns—stripes, speckles, or even full coverage for varied effects.
- Mix metallics by layering gold, silver, or rose gold for a luxe look.
- Use a soft, dry brush to gently remove excess gold leaf without damaging the design.
Common Mistakes:
- Applying too much glue can make the gold leaf clump instead of laying flat. A thin layer is best.
- Touching the egg too soon—let the glue set slightly before pressing on the gold leaf.
- Using a low-quality adhesive—Mod Podge works best to hold the gold leaf securely.
Picture This: Elegant eggs with gold flecks catching the light, making your Easter table look absolutely chic!
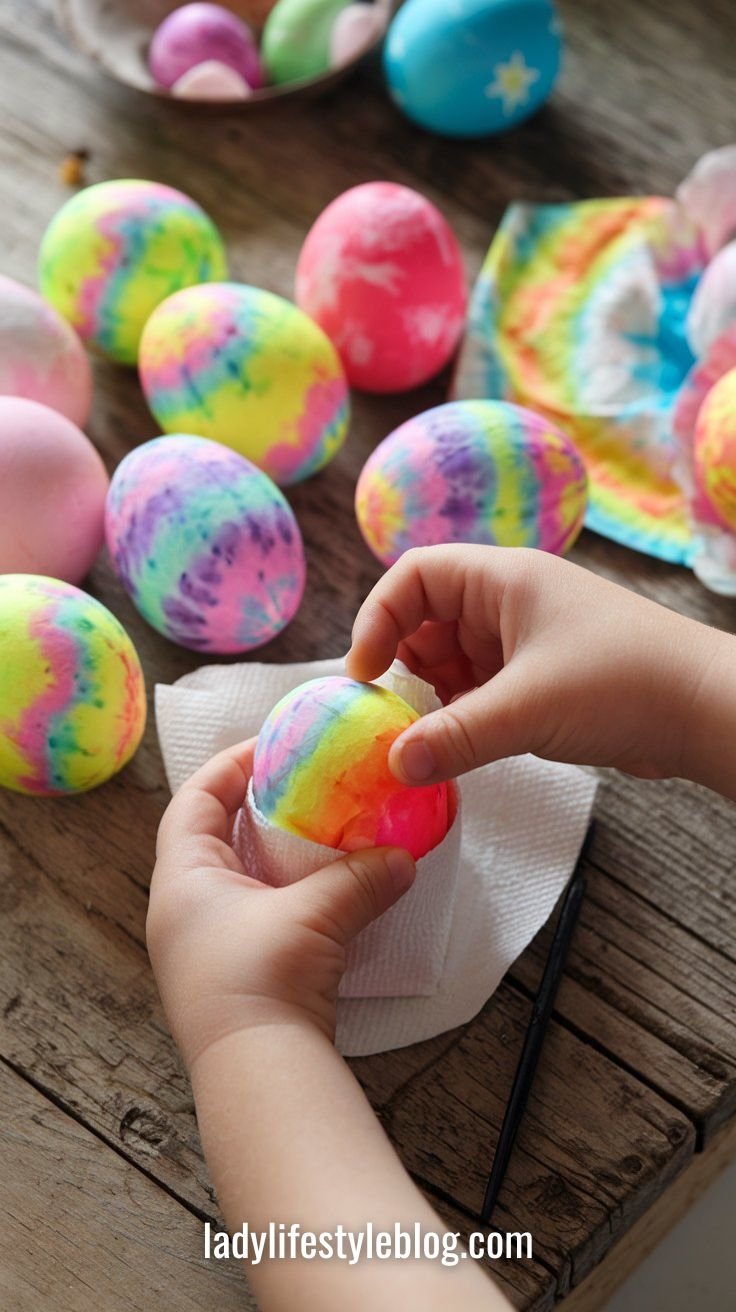
Tie-Dye Easter Egg Designs
Channel groovy vibes with a tie-dye effect using food coloring and paper towels.
How to Do It:
- Wrap each egg in a damp paper towel.
- Drip different food coloring shades onto the paper towel.
- Let the colors soak in for 10-15 minutes before unwrapping.
- Dry on a rack and admire the psychedelic patterns!
Pro Tips:
- Use multiple layers of dye for a richer, more intricate pattern.
- Twist and fold the paper towel in different ways to create unique color combinations.
- Let the eggs fully dry in the paper towel before unwrapping to get the best tie-dye effect.
Common Mistakes:
- Over-saturating the paper towel—too much dye makes colors blend into a brownish hue.
- Unwrapping the egg too soon—let the colors fully soak in for better vibrancy.
- Using too few colors—mixing at least three makes the effect more dramatic.
Picture This: A tray of tie-dye eggs in vibrant blues, pinks, and yellows, each with its own unique pattern.
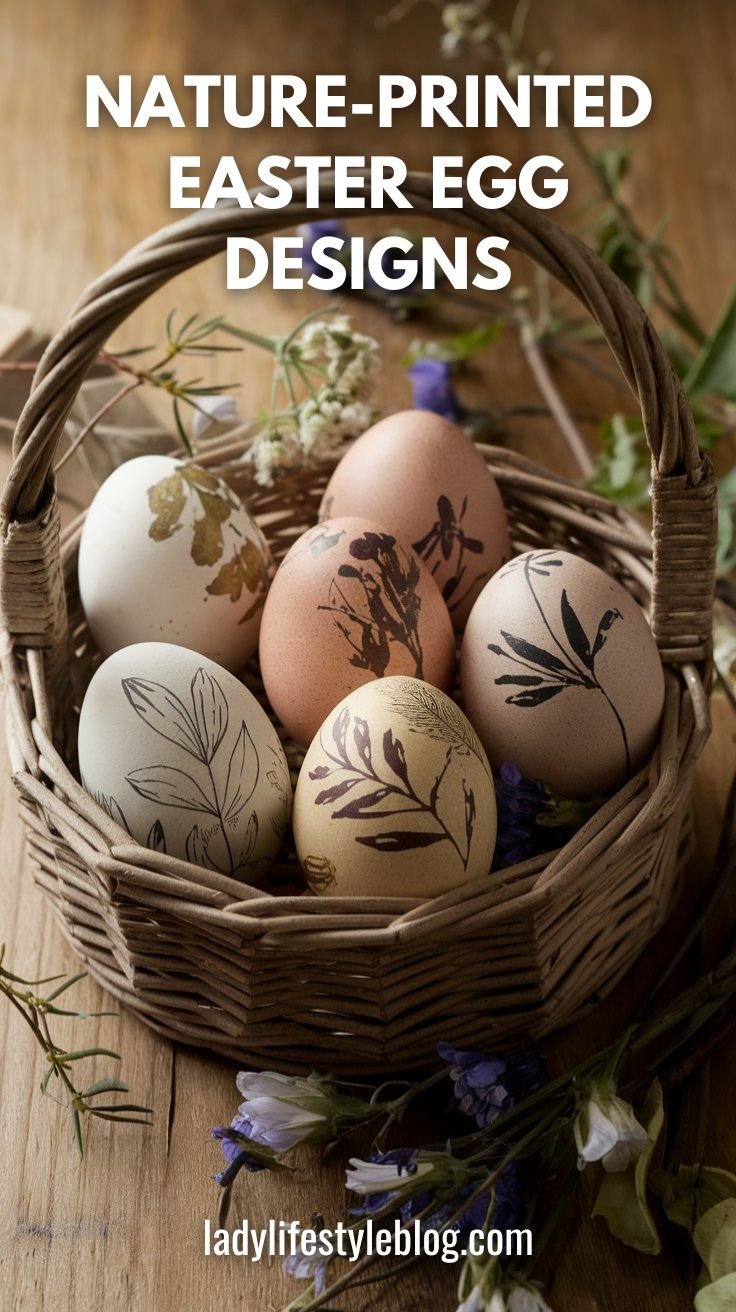
Nature-Printed Easter Egg Designs
Use leaves and flowers to create stunning natural prints on your eggs.
How to Do It:
- Press small leaves or flowers onto the egg and secure with a nylon stocking.
- Dip the egg in natural dye (like onion skins or red cabbage water) and let sit.
- Remove the stocking and leaf to reveal a beautiful silhouette.
Pro Tips:
- Choose leaves and flowers with strong shapes for the best contrast. Ferns and lace-like leaves work beautifully.
- Use brown eggs for a rustic, natural look, as they take on dye differently.
- Double-dip in different natural dyes (e.g., red cabbage first, then turmeric) for a layered color effect.
Common Mistakes:
- Not securing the leaf properly—wrap it tightly in the stocking to prevent dye from seeping under it.
- Using weak dye solutions—let the eggs soak longer for richer colors.
- Rubbing the egg too hard when removing the leaf, which can smudge the design.
Picture This: Delicate floral patterns on deep, earthy-colored eggs, straight out of a cottagecore dream!
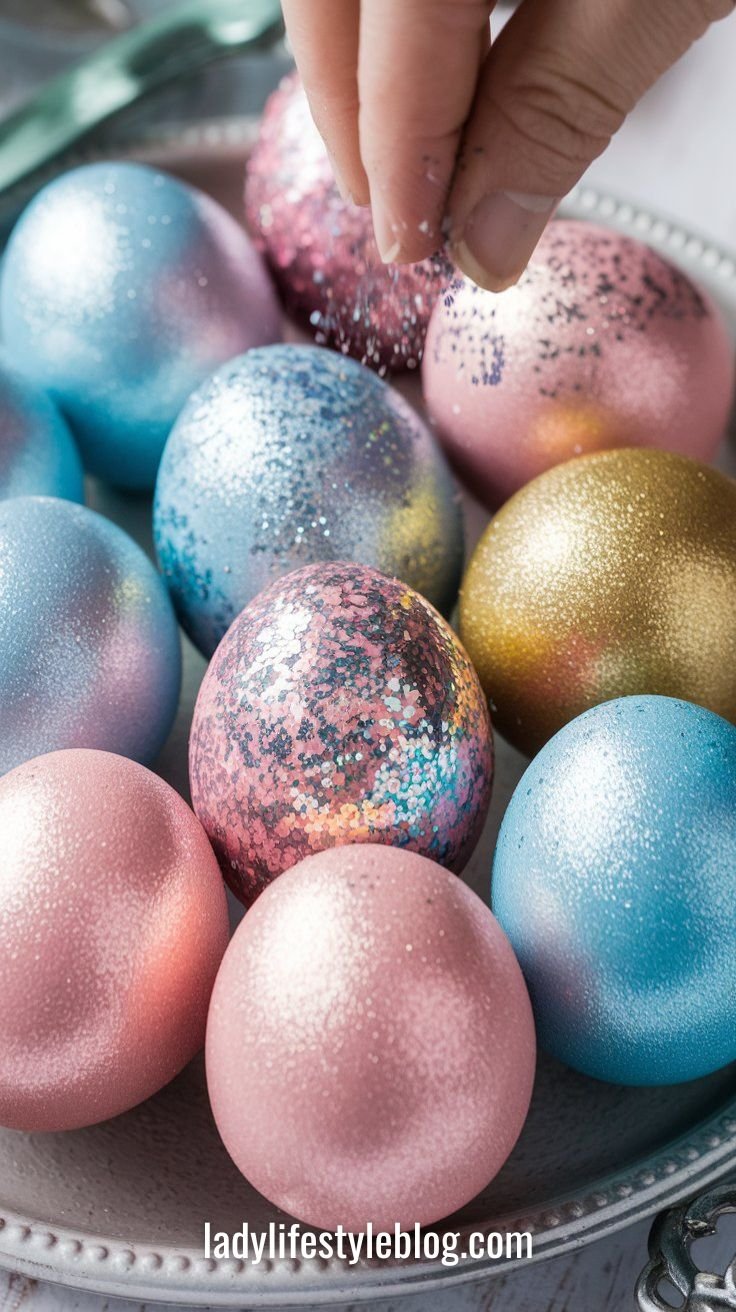
Glitter Glam Easter Egg Designs
Turn your eggs into sparkling showstoppers with an easy glitter coating.
How to Do It:
- Brush Mod Podge or craft glue onto your eggs.
- Roll or sprinkle fine glitter over the surface.
- Let dry and shake off excess glitter.
- Seal with a clear acrylic spray to prevent shedding.
Pro Tips:
- Use fine glitter for a smooth, elegant look—chunky glitter can look messy.
- Apply glue in patterns (stripes, polka dots, ombré) for a more intentional design.
- Let eggs dry in an egg carton to keep them from rolling and smudging the glitter.
Common Mistakes:
- Applying too much glue—this can cause clumping and uneven texture.
- Skipping the sealant step—without a top coat, glitter can shed everywhere.
- Handling the eggs too soon—glitter needs time to fully adhere.
Picture This: A dazzling display of glittered eggs in every color, twinkling like Easter jewels!
Calligraphy & Doodle Easter Egg Designs
Personalize your eggs with handwritten messages or fun doodles.
How to Do It:
- Use a fine-tip Sharpie or paint pen to write words, draw florals, or sketch patterns.
- Keep designs simple for a chic, modern look.
- Let dry completely before handling.
Pro Tips:
- Use metallic Sharpies for an elegant, refined touch.
- Sketch your design lightly in pencil first if you’re worried about making mistakes.
- Try white gel pens on darker eggs for a chalkboard-inspired look.
Common Mistakes:
- Pressing too hard with the marker—it can smudge or break delicate eggshells.
- Using low-quality markers that smear or fade quickly.
- Writing before the egg is completely dry—always let the dye or paint set first.
Picture This: Eggs with cute doodles, inspiring words, and elegant script, making Easter extra meaningful!

FAQ: Everything You Need to Know About Easter Egg Designs
Q: Can I eat decorated eggs?
A: Yes, if you use food-safe dyes or natural ingredients. Avoid eating eggs decorated with nail polish, glue, or permanent markers.
Q: How long do decorated eggs last?
A: Hard-boiled eggs should be refrigerated and eaten within a week. Hollowed-out eggs can last indefinitely if handled gently.
Q: Can I use brown eggs?
A: Absolutely! They add a unique, earthy tone to the designs and work great with gold accents and natural dyes.
Conclusion
Easter egg decorating is all about creativity and fun! Whether you love the elegance of gold leaf, the whimsy of tie-dye, or the sparkle of glitter, these 7 Easter egg designs will make your holiday extra special. Gather your supplies, pick your favorite technique, and let your imagination run wild. Happy decorating!
At Lady Lifestyle Blog, I use AI as a tool to assist with research, idea generation, and content refinement. While much of my content is shaped with AI’s help, I personally review and adjust each post to ensure it aligns with the blog’s style and purpose. My focus is on providing stylish, creative, and practical inspiration for every modern lady!